
Create your first discount
You get one working discount: 10% off the order total, applied without a code. It takes four steps.
-
Open the discount chooser.
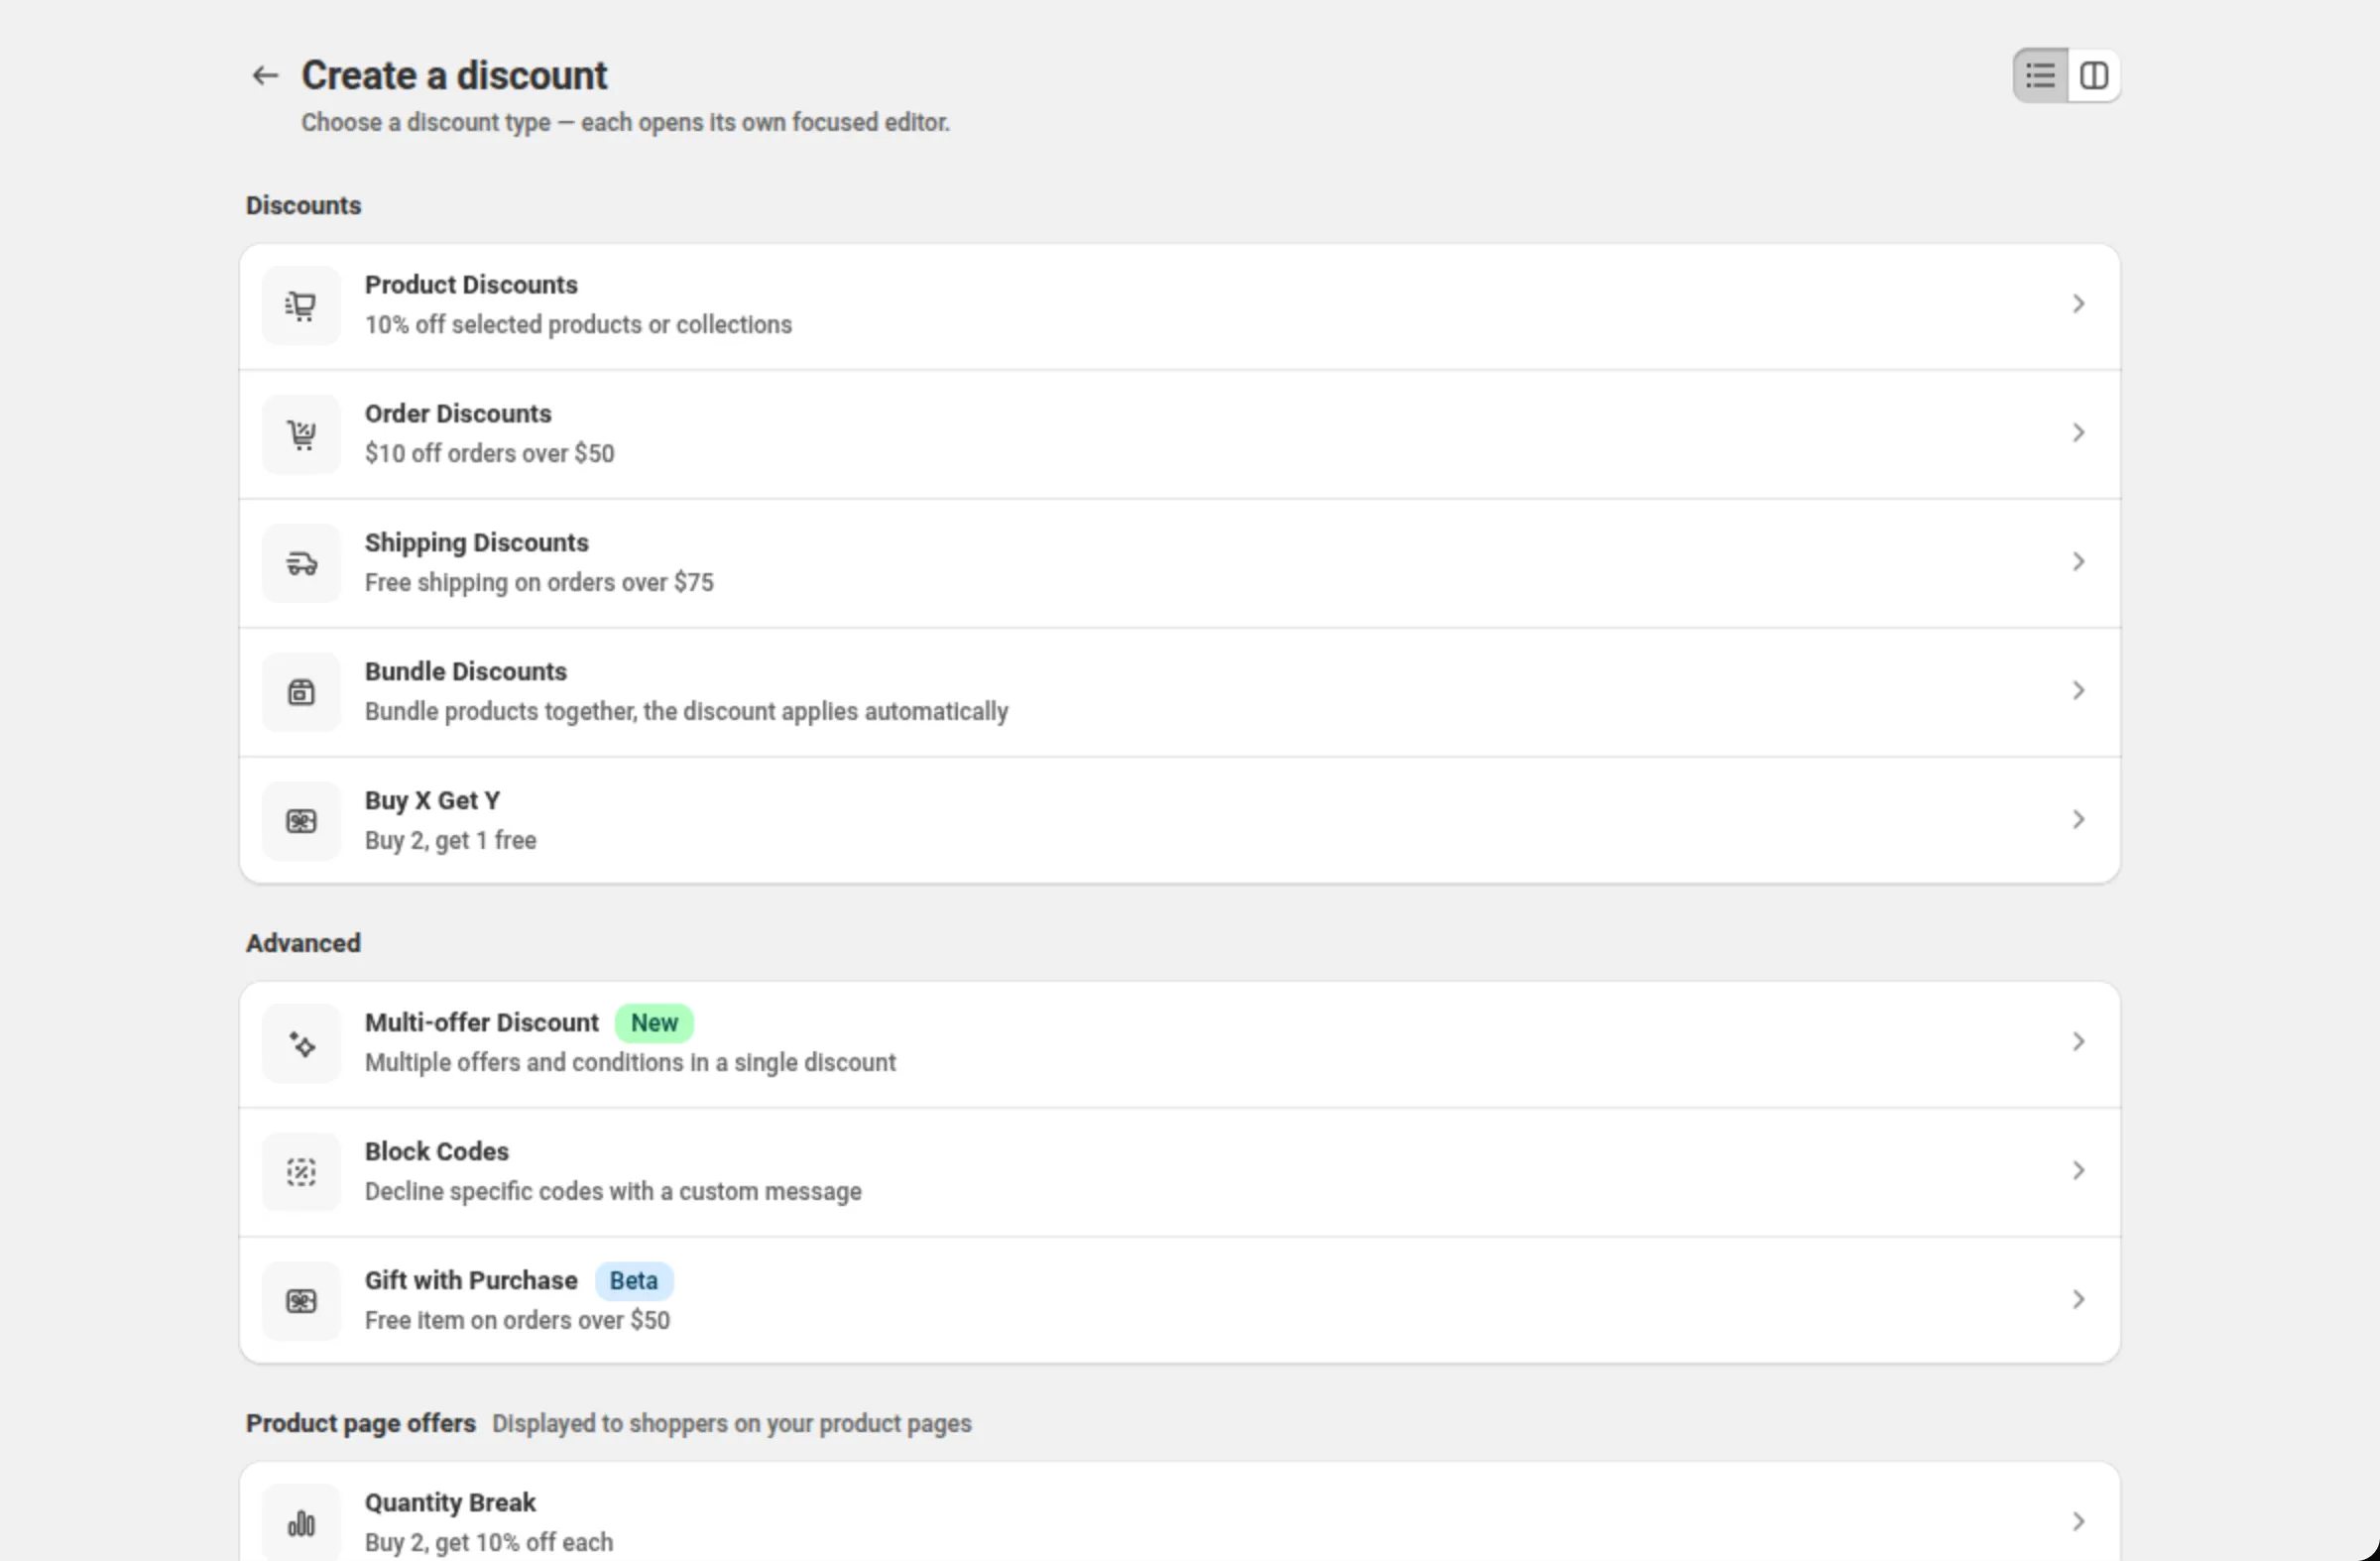
Go to Manage discounts and click Create discount. The page is titled “Create a discount”, and every type the app can build is on it.
-
Choose Order Discounts, and name the discount.
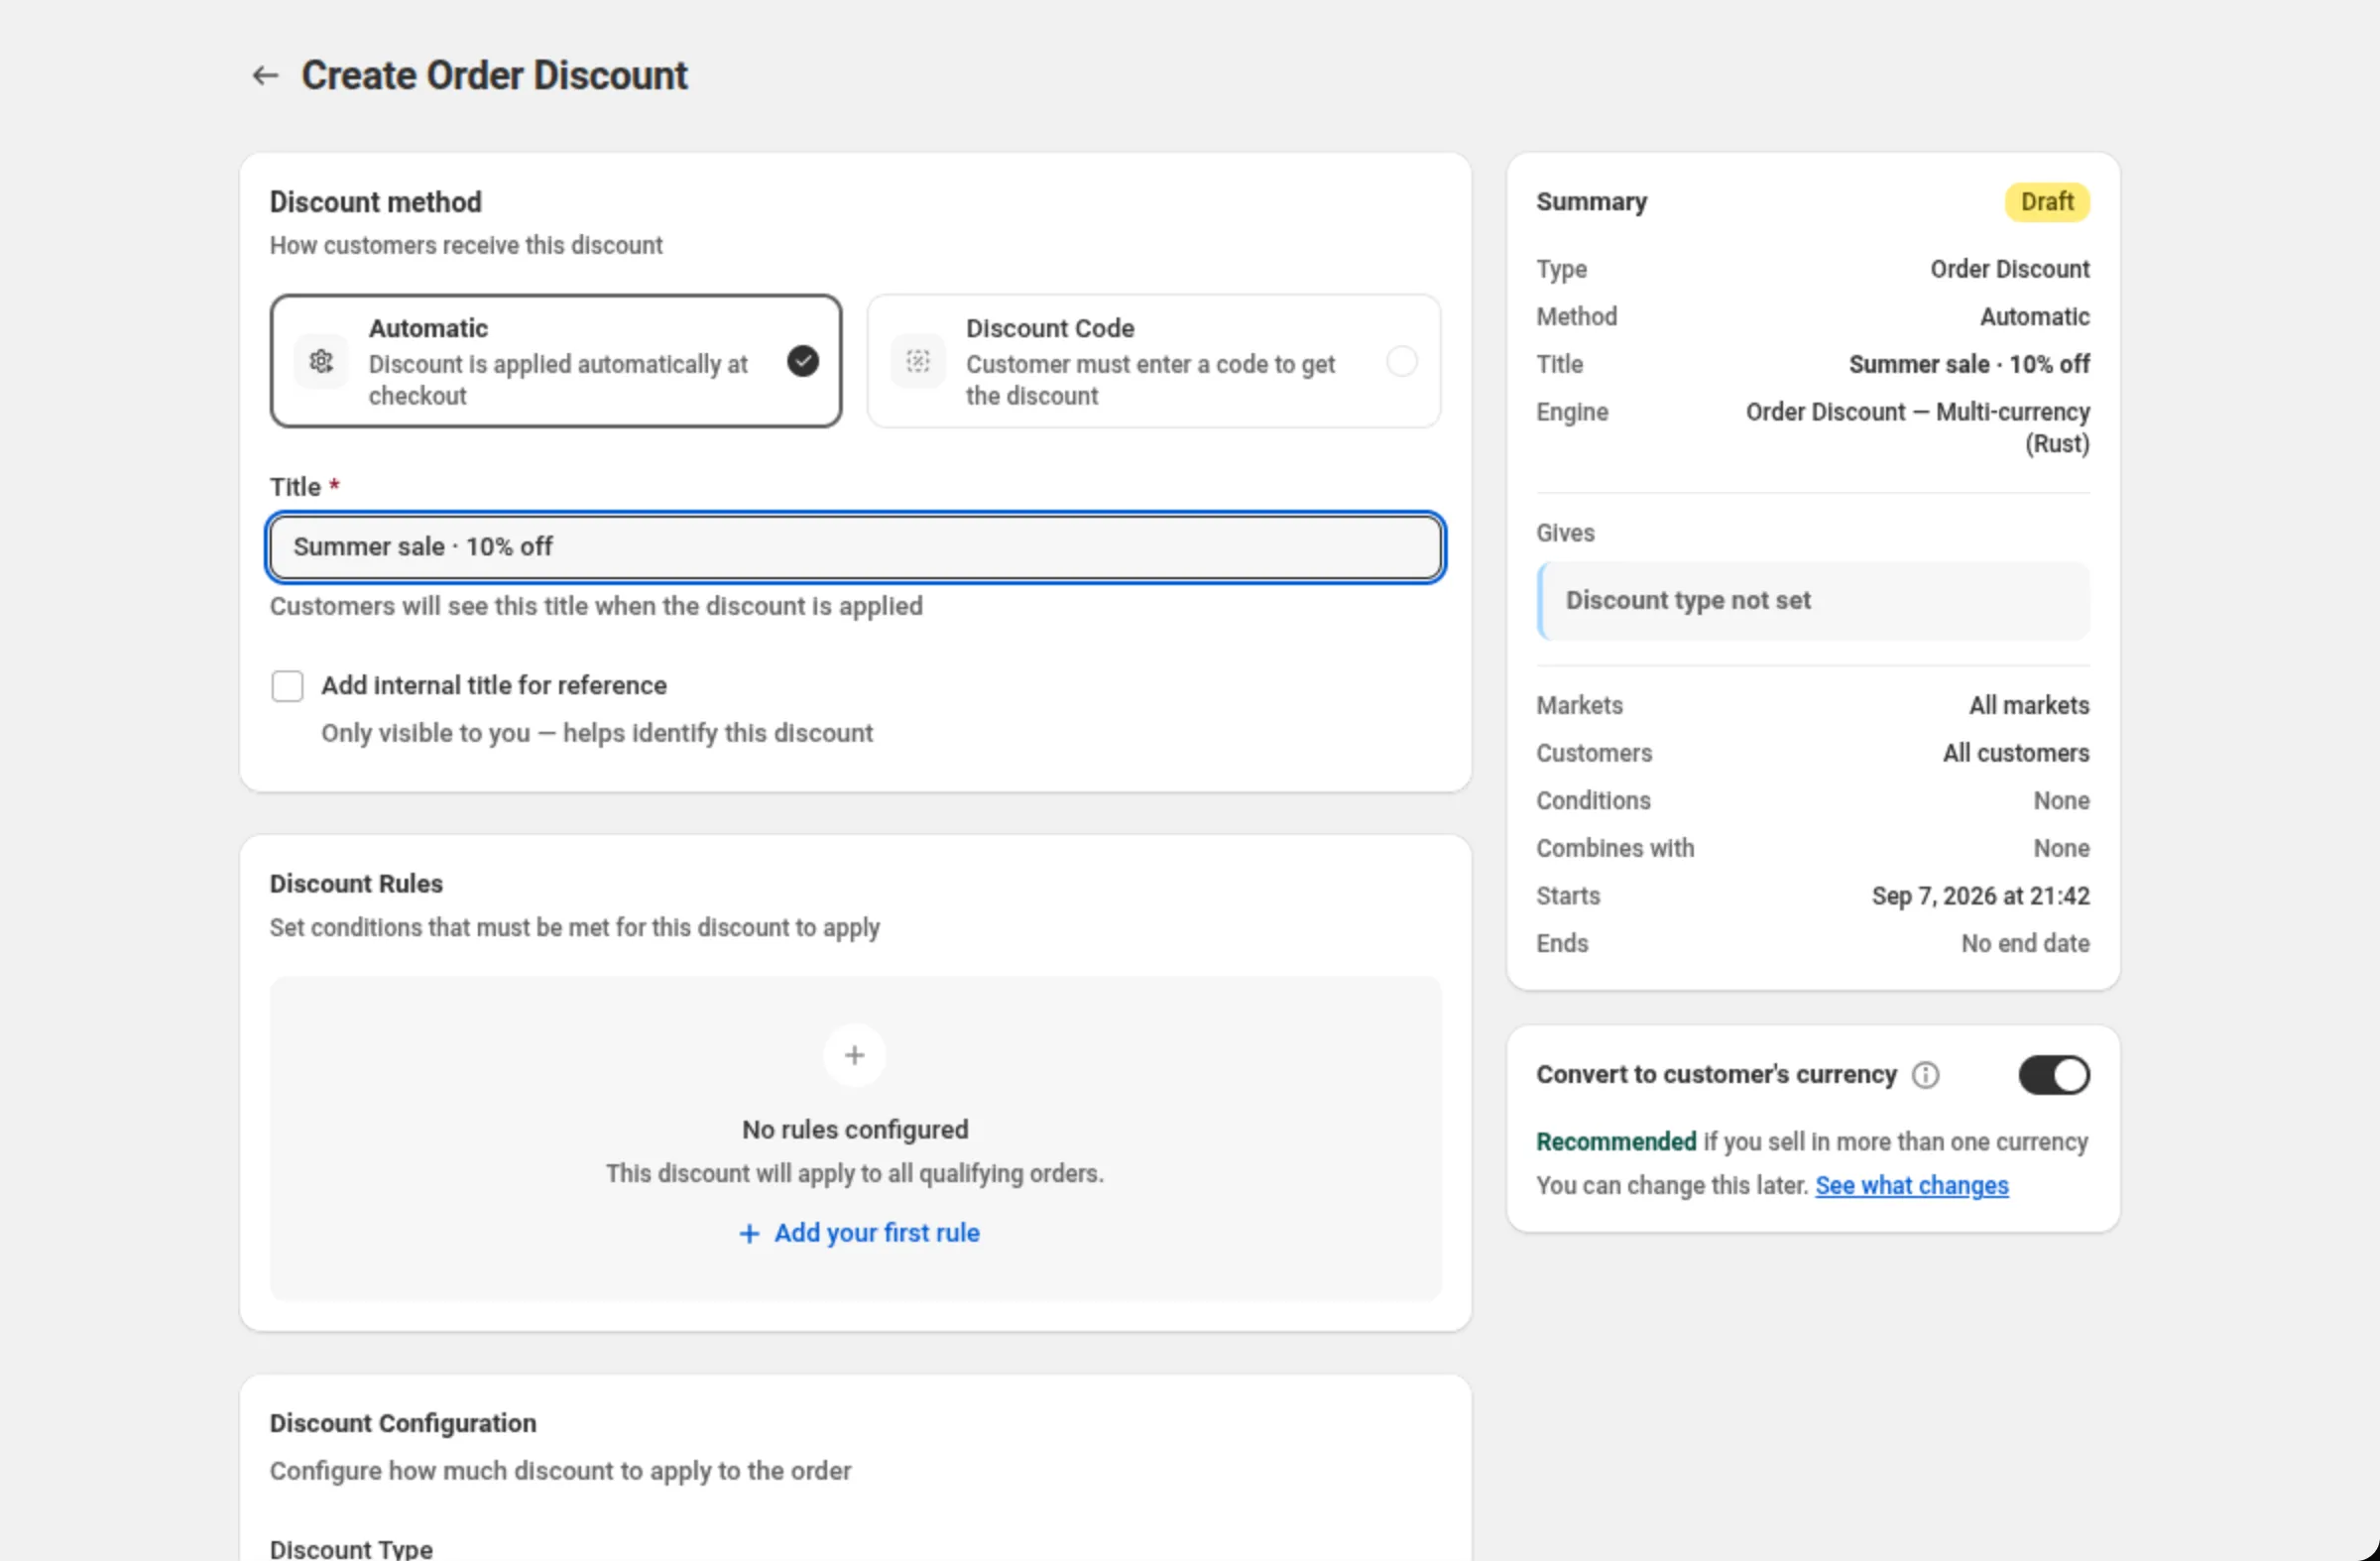
The row you want is Order Discounts, described as “$10 off orders over $50”. It opens a page titled “Create Order Discount”.
Under Discount method, Automatic is already chosen — leave it. Then fill in the title:
Title: Summer sale · 10% offThe help text under the field says what that title is for: “Customers will see this title when the discount is applied”. Write it for shoppers, not for yourself.
-
Set the discount.
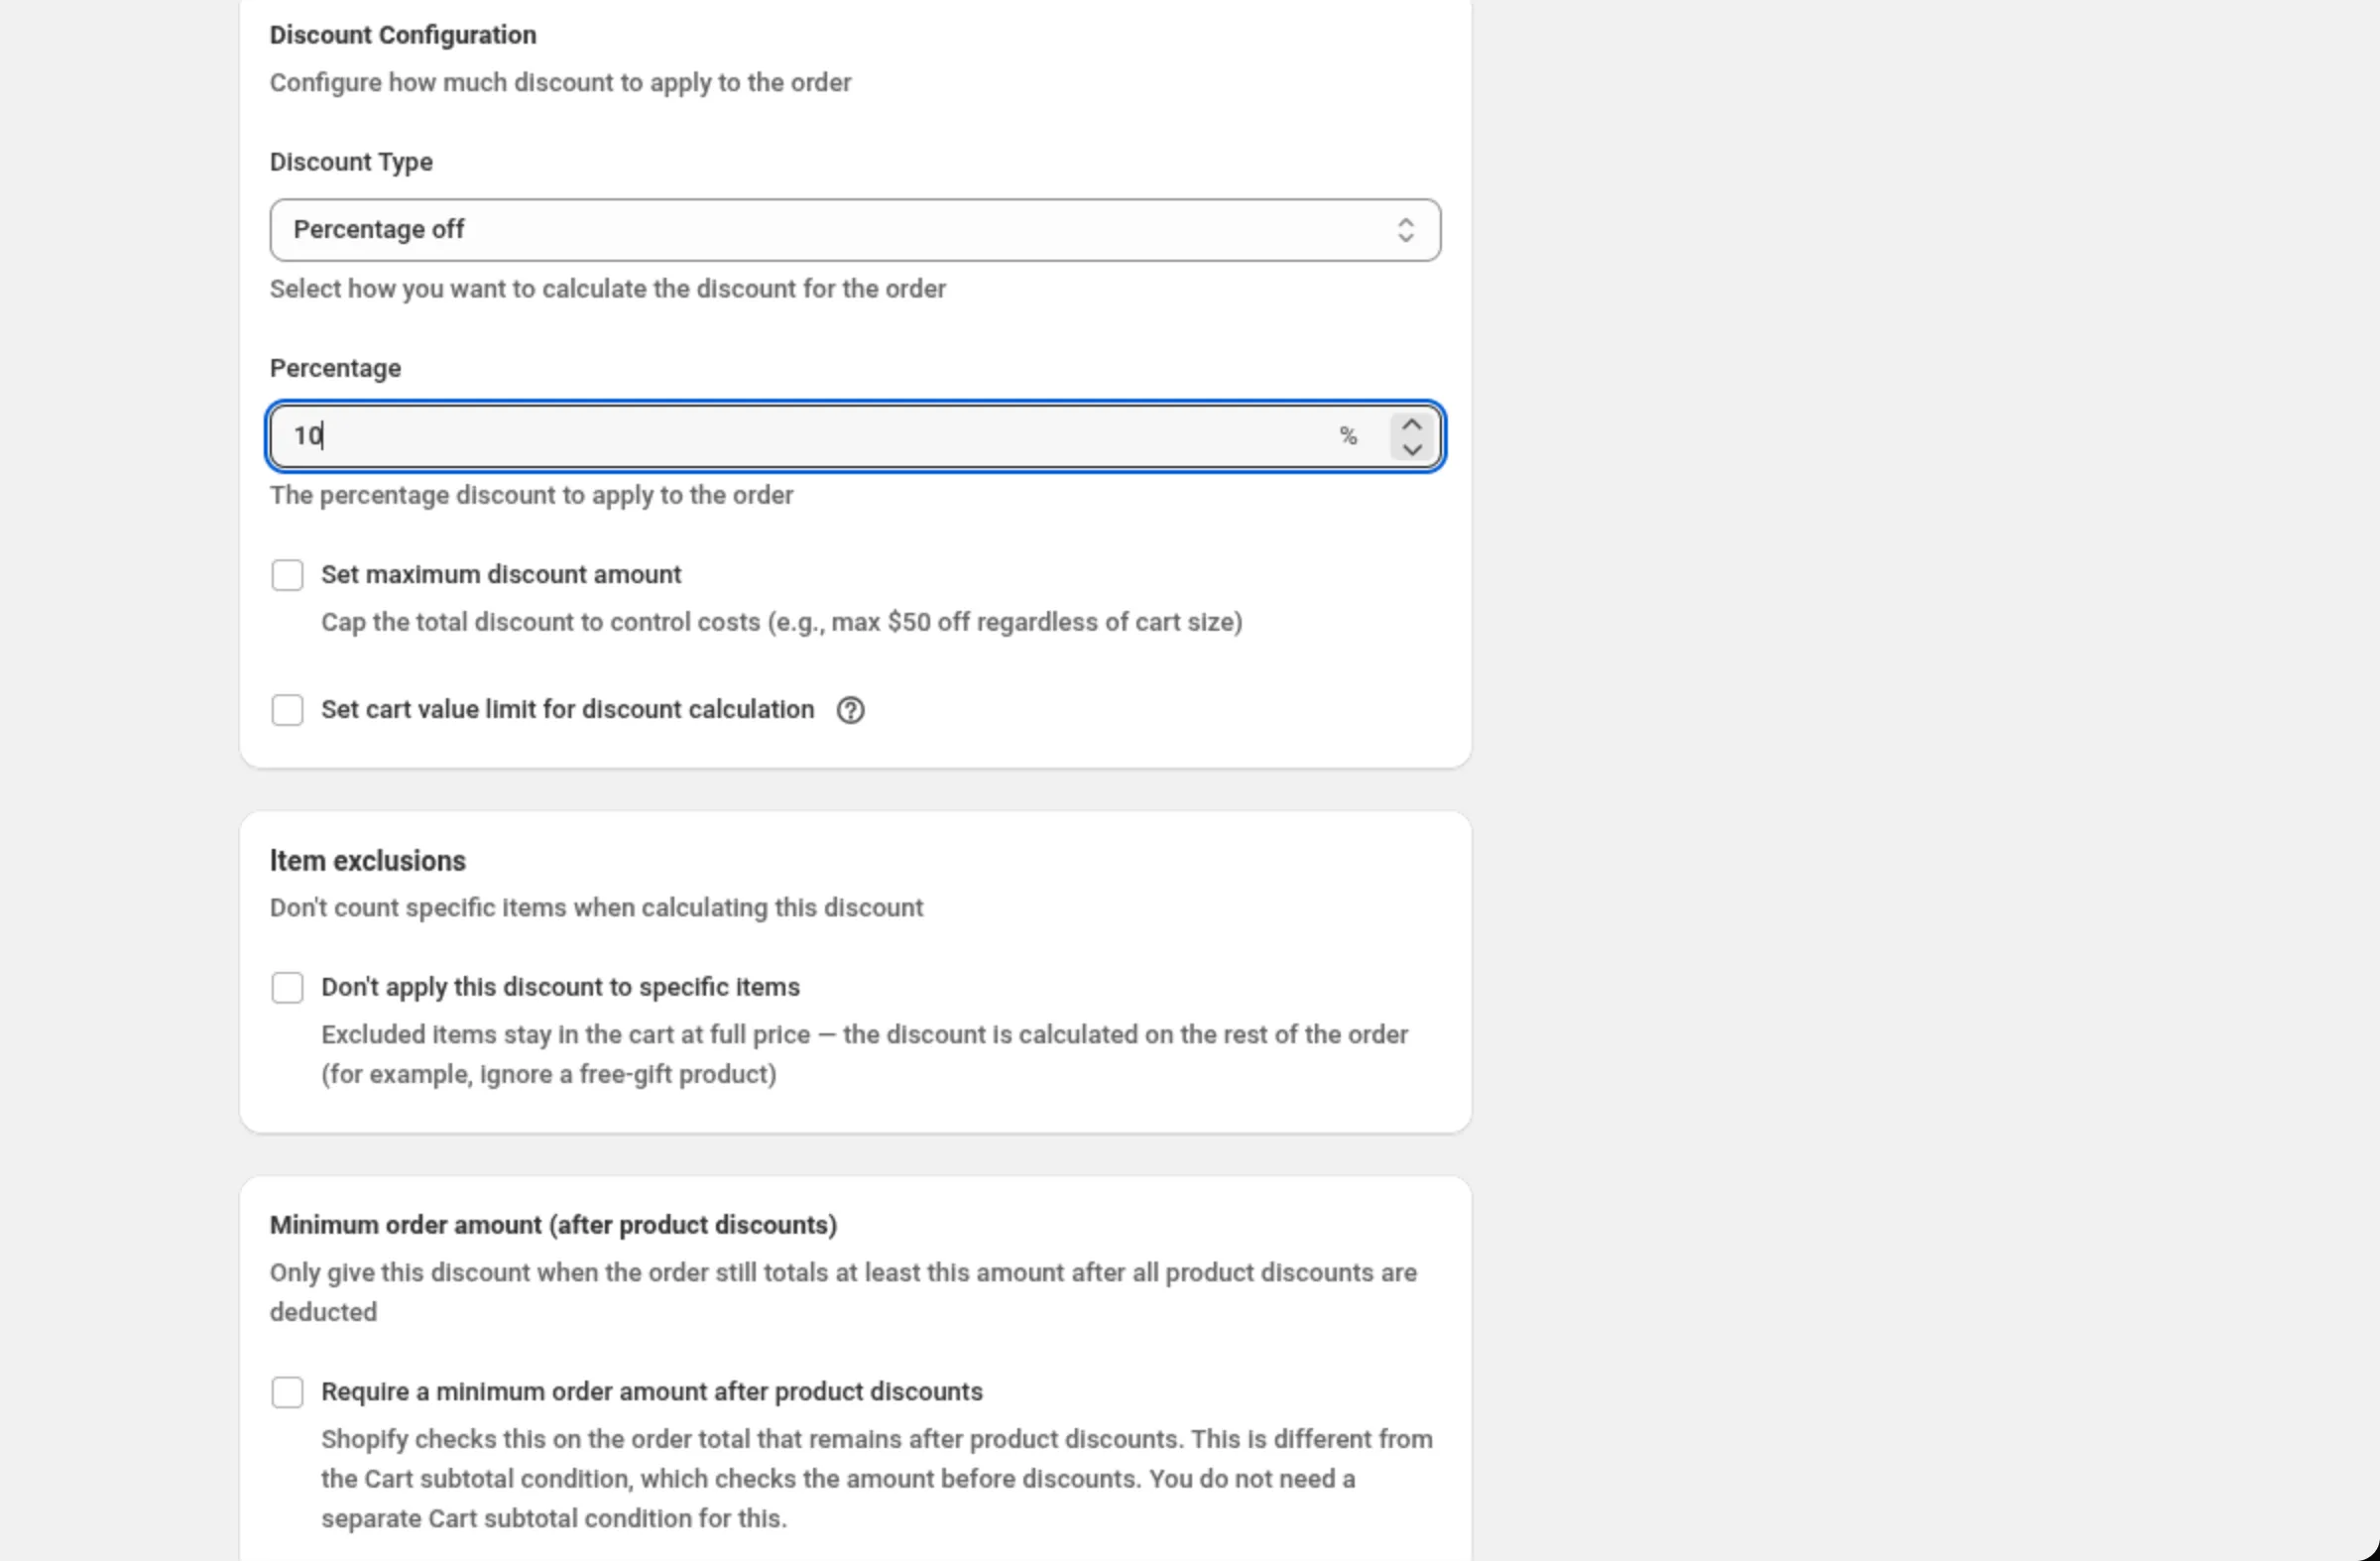
Scroll to Discount Configuration and set two fields:
Discount Type: Percentage offPercentage: 10Leave Set maximum discount amount and Set cart value limit for discount calculation unticked. Leave Discount Rules empty — with no rules the page tells you exactly what that means: “This discount will apply to all qualifying orders.”
-
Save it.
The save bar appears at the top as soon as the form differs from what was loaded. Click Save. (Discard on the same bar throws the changes away.)
The app confirms with “Discount created” and opens the discount for editing.
What the summary shows
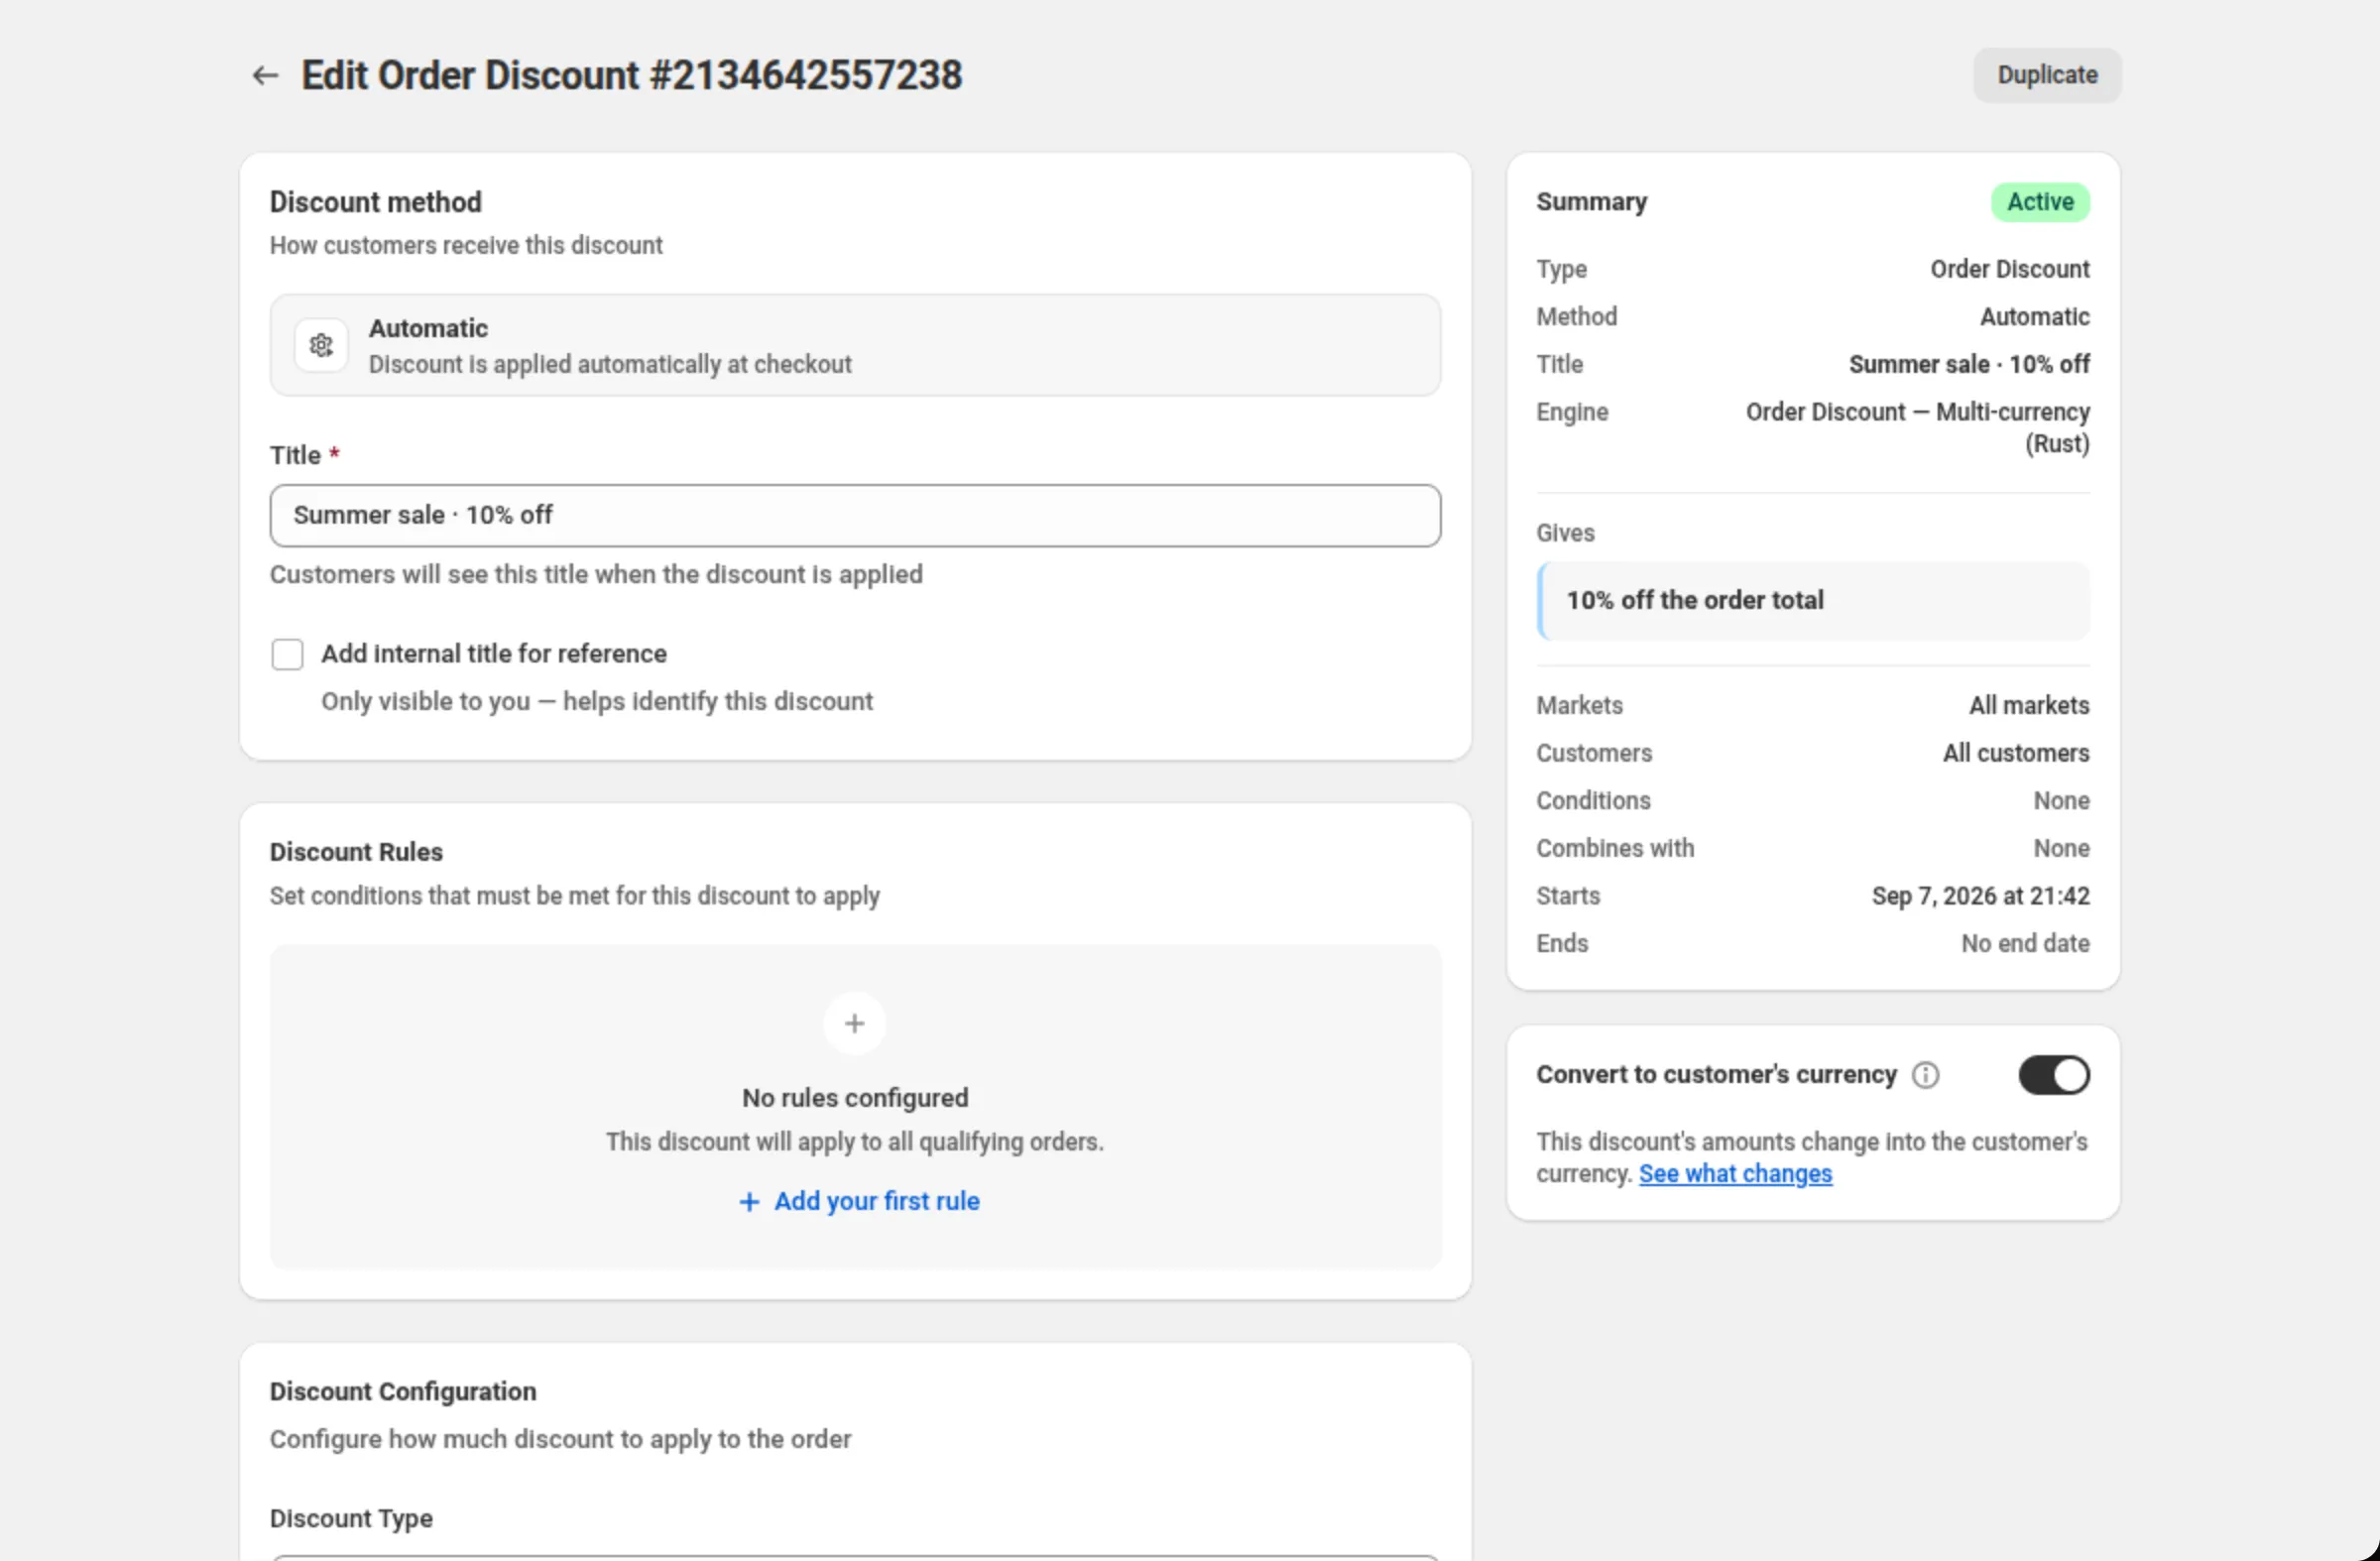
Section titled “What the summary shows”The Summary card on the right is built from what is on the page, and it updates as you type. After saving, it reads:
- A status badge — Active on a discount that is running now. Before you save, that badge says Draft.
- Type — Order Discount.
- Method — Automatic.
- Title — Summer sale · 10% off.
- Engine — which of the app’s discount engines this discount is bound to.
- Gives — 10% off the order total. This line is the reward in words. Until you pick a discount type it reads “Discount type not set”, so a half-finished discount can never look finished.
- Markets — All markets. Customers — All customers. Conditions — None. Combines with — None. Starts — the date and time it began, in your store’s timezone. Ends — No end date.
Below the summary, Convert to customer’s currency is on by default. Leave it on unless you have a reason not to; it only matters if you sell in more than one currency.
The page header now reads “Edit Order Discount” with the discount’s number, and a Duplicate button sits next to it — the fastest way to build a second, similar discount.
What this discount does
Section titled “What this discount does”Nothing else is required. The discount is live on your store, it takes 10% off the order total, and there is no code for the shopper to enter. With no rules set, Shopify applies it to every qualifying order.
Change it, or turn it off
Section titled “Change it, or turn it off”Open it again from Manage discounts. One thing you cannot change afterwards is the discount method: automatic or code is fixed when the discount is created, so the edit page states the method instead of offering the choice again.
Related
Section titled “Related”- Where discounts show — automatic versus discount code, and what the shopper sees.
- Install DiscountOS — if you have not installed the app yet.